In this post I’ll walk you through the steps required to populate the software cache using the Copy Software feature built into CommVault.
Intro
When installing Commvault v11new, or upgrading from a previous version, CommVault will not prompt you with the option to populate the software cache from the installer files (as of v11 SP3). So when you perform the first push upgrade of the software to a client machine, the CommServe will download the media directly from CommVault's cloud respository. Unfortunately, this process is capped at about about 10Mbps.
In contrast, obtaining the software via the bootstrap downloader is not capped on speed and the download is much faster. Typically, the download can go as fast as the internet connection will allow. To ensure that the upgrade/install process is not stopped while the CommServe is downloading the latest software, the software cache can be populated manually. The official CommVault documentation on this process can be found here.
1. Identify Download Location
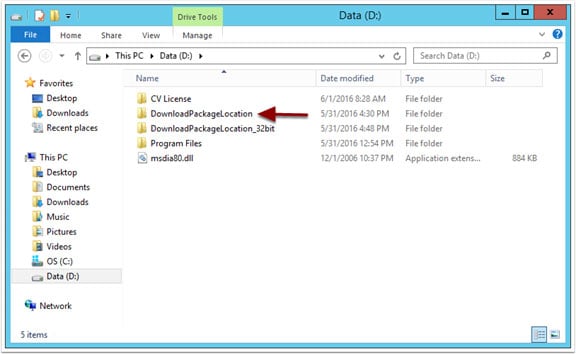
When running the bootstrap downloader, the default location for the download is C:\DownloadPackageLocation.
If this location was changed during the download process, identify this location. (In this environment, the download location was changed to D:\DownloadPackageLocation.)
2. Folder Contents
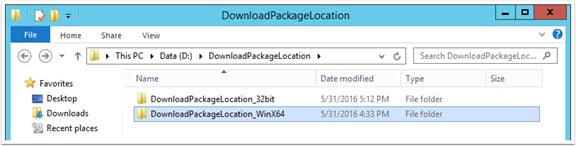
During the download process, the option is presented to download just the 64-bit binaries or both the 32- and 64-bit binaries. If both are downloaded then the file structure should appear similar to the one below.
But by default, the bootstrapper will just download the 64-bit binaries. If only the 64-bit files were downloaded it’s possible to run through the bootstrapper and then download the 32-bit binaries.
Once the download is complete, copy the DownloadPackageLocation_32bit folder and its contents into the same folder as the DowloadpackageLocation_WinX64 folder is located.
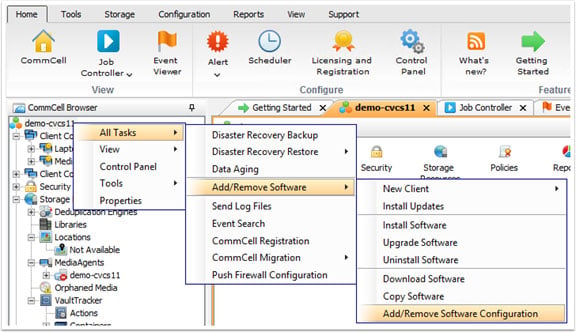
3. Open Copy Software Wizard
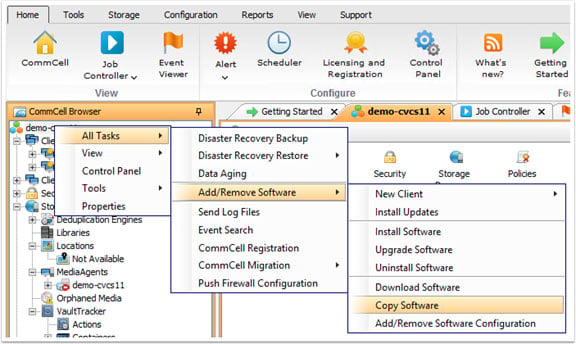
In the CommServe, right click on the CommServe (top most node) and select All Tasks > Add/Remove Software > Copy Software.
4. Specify Copy Software Location
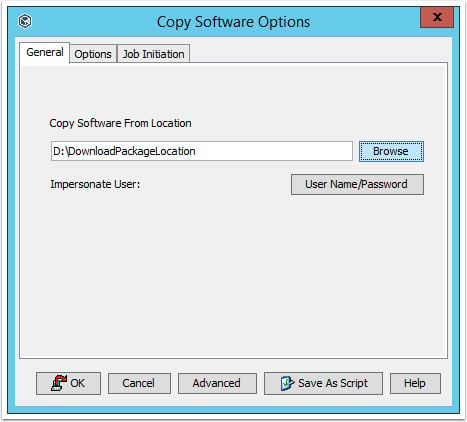
In the Copy Software Options screen, specify the root path of the download directory.
In this case it is D:\DownloadPackageLocation.
Click OK to initiate the software copy job.
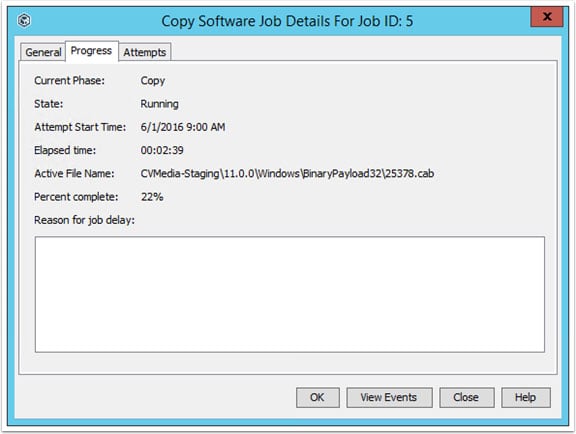
5. Software Copy Job
A Software Copy Job will be started and can be monitored in the CommServe Console Job Controller.
For additional details about the Software Copy Job, open the DownloadSoftware log located in the following path:
[Drive Letter]:\Program Files\Commvault\ContentStore\Log Files\DownloadSoftware.log
6. Validate Software Cache Contents
To validate that the software cache has been populated:
Open the Add/Remove Softare Configuration window.
Right click on the CommServe (top most node) and select All Tasks > Add/Remove Software > Add/Remove Software Configuration.
7. Open Cache Details
In the Add/Remove Software Configuration window, select Cache Details.
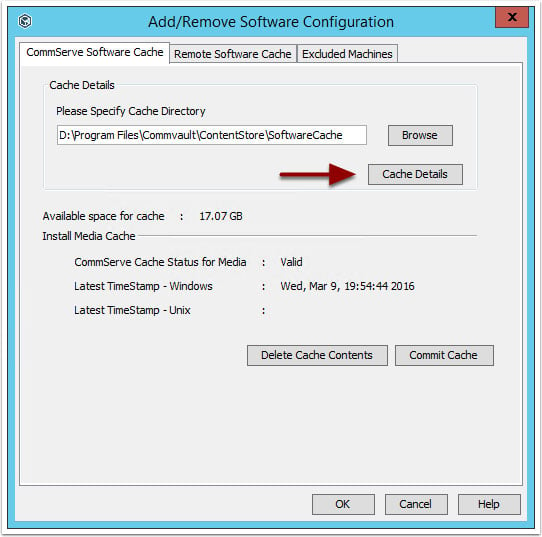
8. Cache Details
The Cache Details window will list the service pack installed including all additional hotfixes.
Note that the binaries are present for both the 32-bit (OS = Windows) and the 64-bit (OS = WinX64) operating systems.

9. Perform Installs/Upgrades
At this point, push installs and/or upgrades can be performed from the CommServe console without waiting for the CommServe to first download the software. Depending on the speed of the internet connection being used, this can shave hours off of the install and/or upgrade process by downloading the binaries from the bootstraper vs. the update from the CommServe console.
We can also manage your technology product and service contracts for you, so you never have to worry about version support and upgrades. We'll work with you to recommend and prioritize upgrades to optimize performance and prevent downtime.  to learn more about this complimentary service provided to Lewan customers.