I was working with a customer recently who wanted to configure 1-Touch to be used for bare metal recovery for some older servers into their VMware environment. After working through the process I thought it would be best if I took a few minutes and documented the process that we'd used as well as a couple tips that will make it easier for folks in the future.
In this example we will be restoring a backup from a physical machine into a VM using the 1-Touch boot CD in offline mode. The original machine was Windows Server 2008 R2, thus we will be using the 64-bit 1-Touch CD.
This section assumes that 1-Touch has already been installed and the 1-Touch CD's generated and available to the VMware infrastructure as .ISO files.
Building the Recovery VM
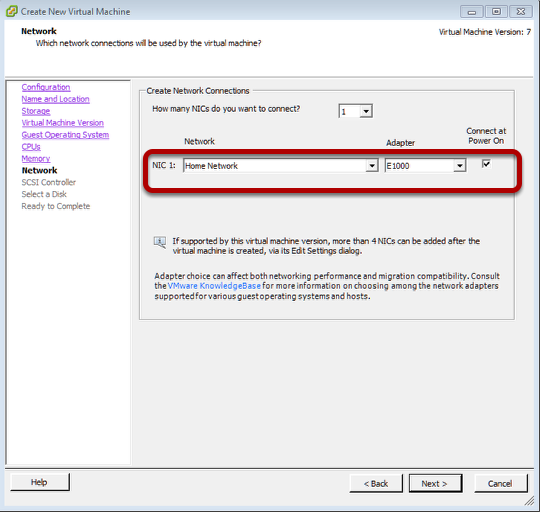
Generally you build this like you would build any other VM, but there are a couple things we want to pay attention to. First is the network adapter.
While in general the VMXNET3 adapter is preferred for VMware VMs, in this instance we want to specify the E1000 adapter because drivers for this are embedded in the Windows distribution, and thus in the 1-Touch recovery disk. You can change the adapter on the VM later if you're so inclined, but using the E1000 for the restore will make things easier.
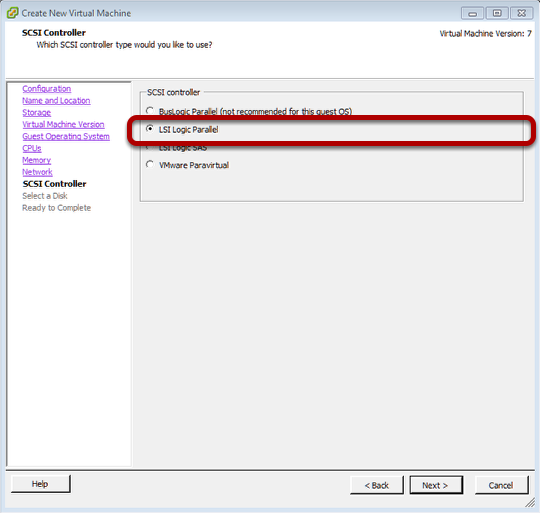
The second item is the SCSI controller. Again, while the SAS adapter is generally preferable, our restore is going to be easier if we select the LSI Logic Parallel adapter (for reasons we'll discuss in a few minutes). Note this can be made to work with the SAS adapter, but it'll require more editing of files, and like the network adapter you can change it later after the OS is installed so this makes it easier.
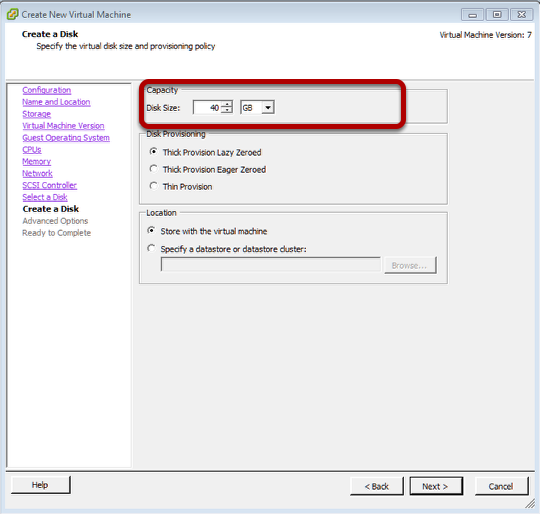
Pay attention to the creation of Disks. You need the same number and approximate size (larger, not smaller) as the original machine. It is possible to do a dissimilar volume configuration, but you'll spend more time fiddling, and it will still insist that all volumes be at least as big as the original.
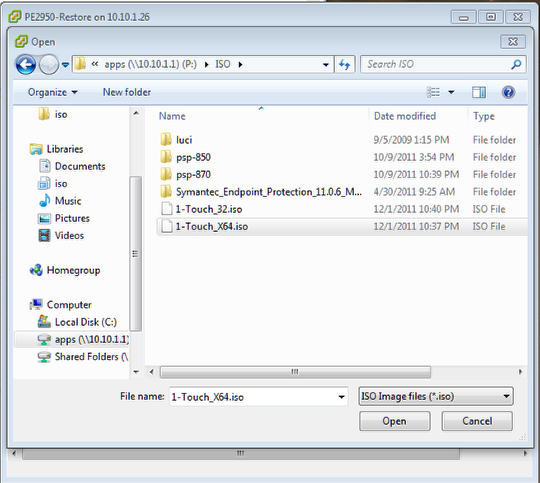
Power on the VM and mount the appropriate 1-Touch iso. In this case we're using the 1Touch_X64.iso file
1-Touch Recovery
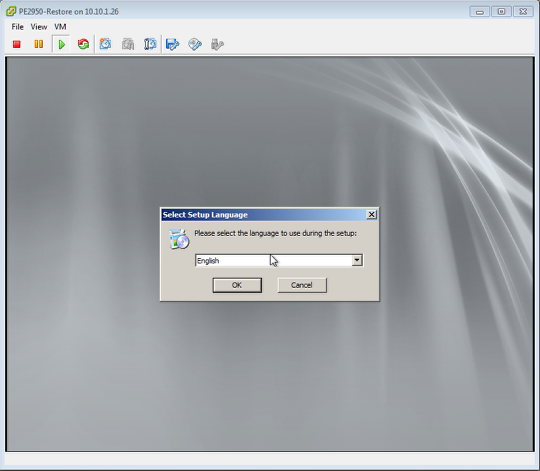
Booting the VM from the 1-Touch CD will start the interactive process. When prompted pick your favorite language and then click ok.
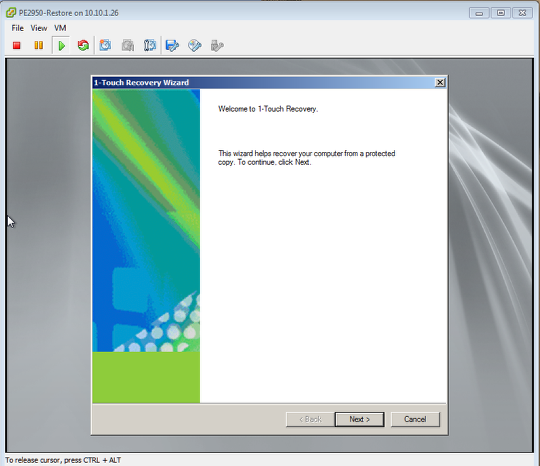
Click next at the welcome screen. (note if you are asked about provding a configuration file, specify 'cancel' to go into the interactive mode).
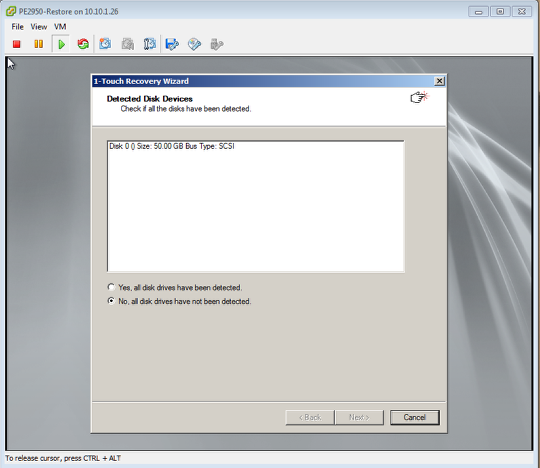
Verify that your disks have all been detected, then select yes and then click next.
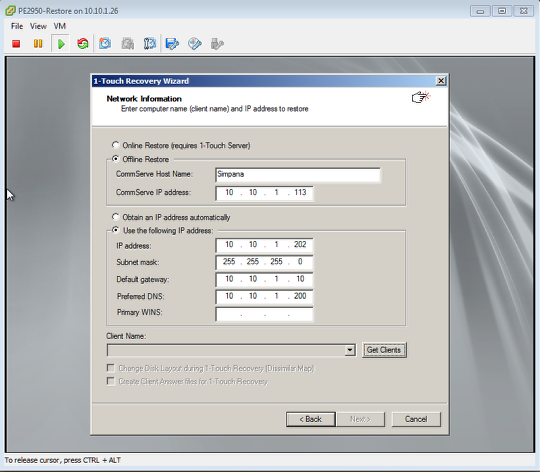
Fill out the CommServe and client information, then click the "Get Clients" button to get the list of clients from the CommServe.
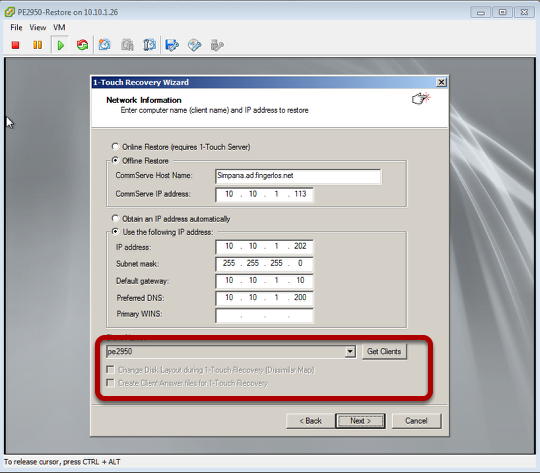
Select the client you want to recover, then click next.
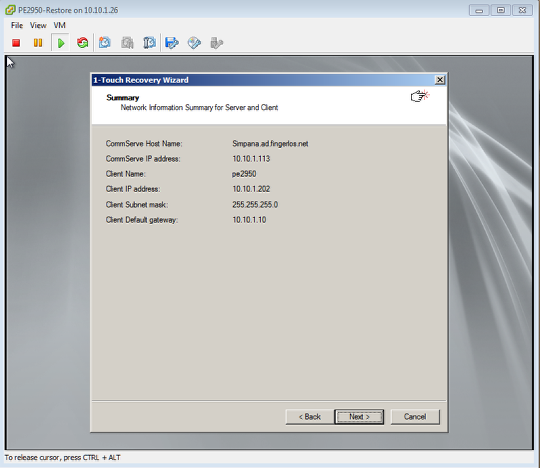
Review the Summary then click next.
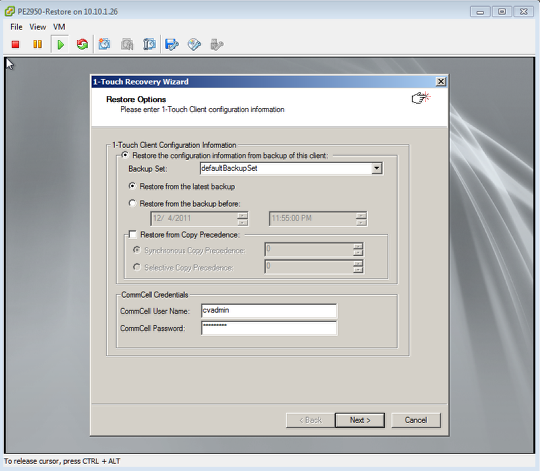
Select the backup set, and point in time for the recovery; then provide a CommCell username and password for the restore. Then click next.
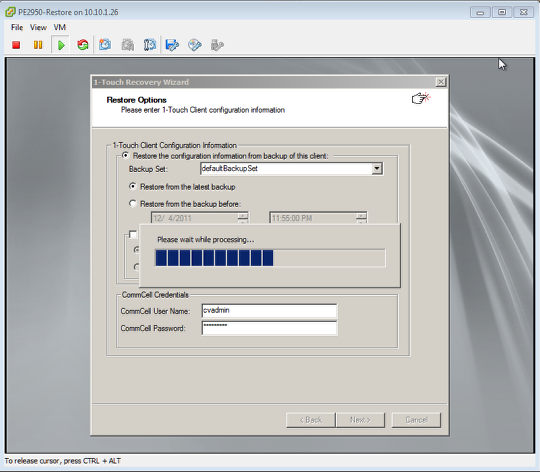
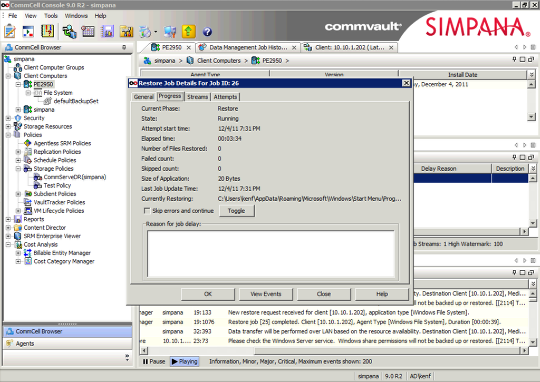
You'll see the 'please wait while processing' message ... at this point you may want to watch a CommCell Console session.
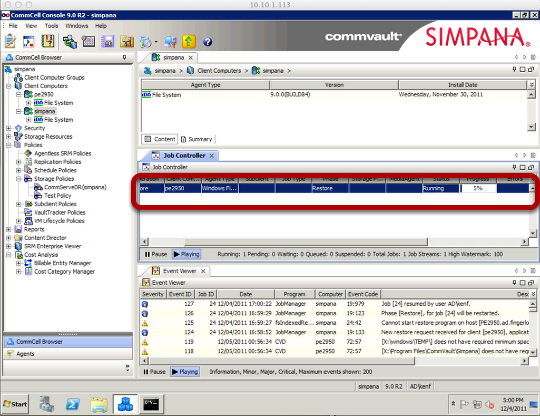
You'll see that a restore job has been created. You'll need to watch this job for the restore to complete.
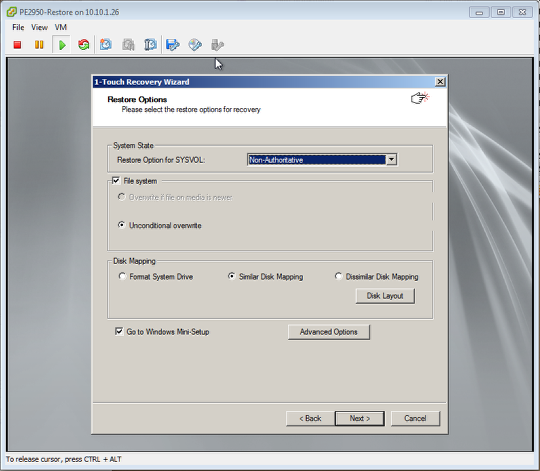
Now that the 1-Touch details have been restored we need to deal with disk mapping. In this case we will leave it with 'similar disk mapping' and disable the mini-setup (uncheck the box checked by default). Ok the warning about devices not matching (we'll fix that later). Then click next.
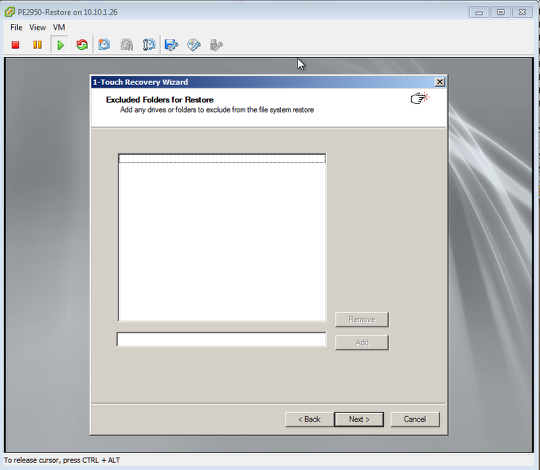
Don't exclude anything (unless you really know you want to). Click Next.
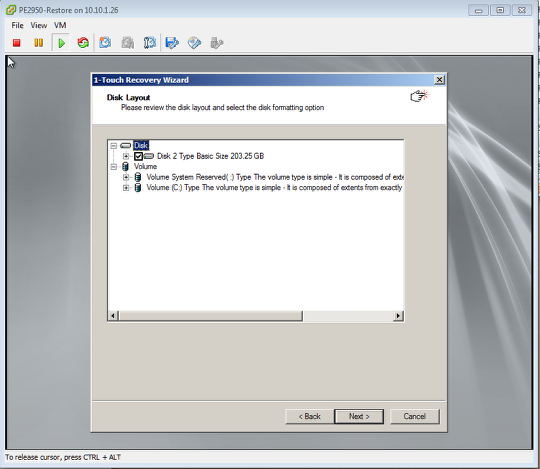
This is a review of the original disks. Click next.
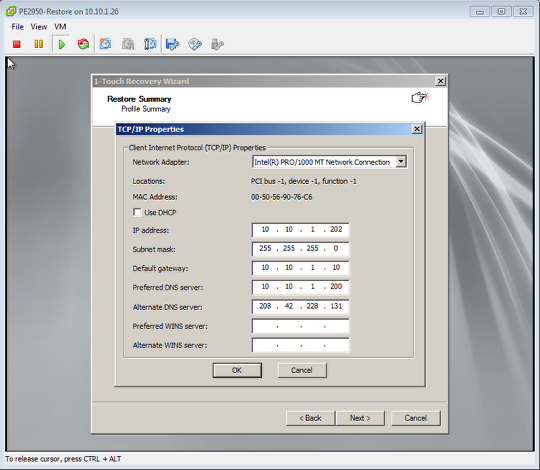
Review or reconfigure the network binding correctly for this restore. Then click Ok.
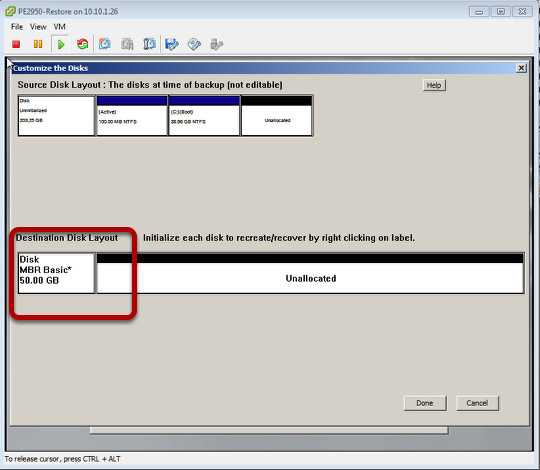
Right click on the disk name and initialize if necessary. Then click Done.
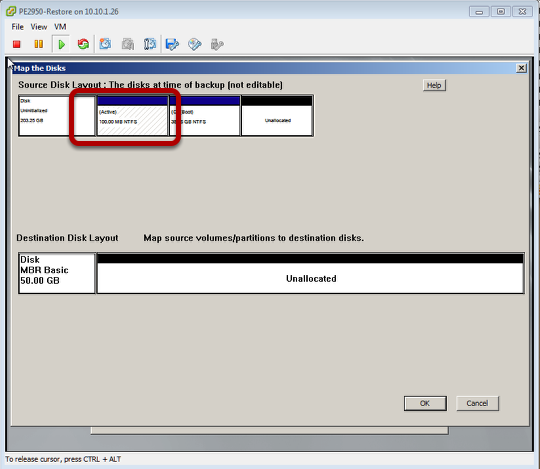
Map the volumes to the disk by right clicking on the source, and mapping to the destination disk.
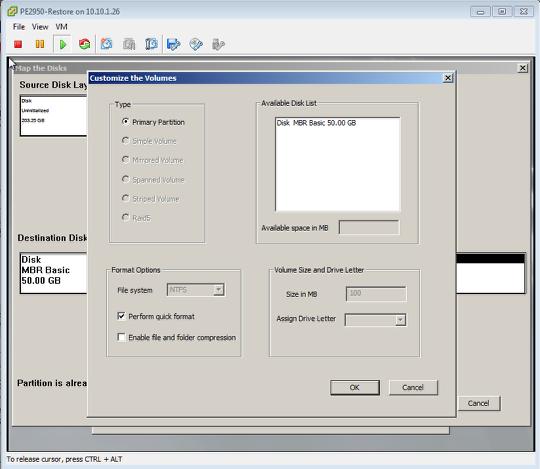
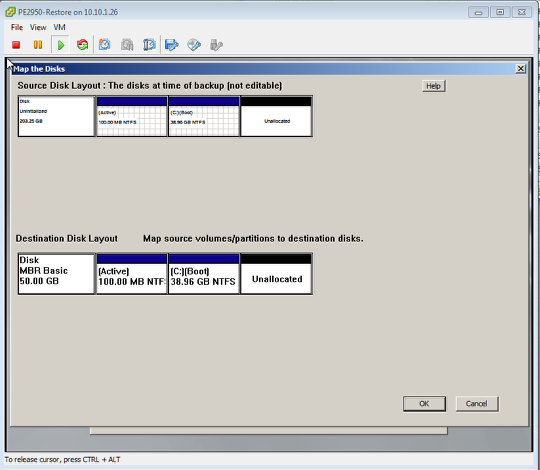
Repeat above for each volume. Once all volumes are mapped to the destination, click Ok.
The system will format the disks and start the restore.
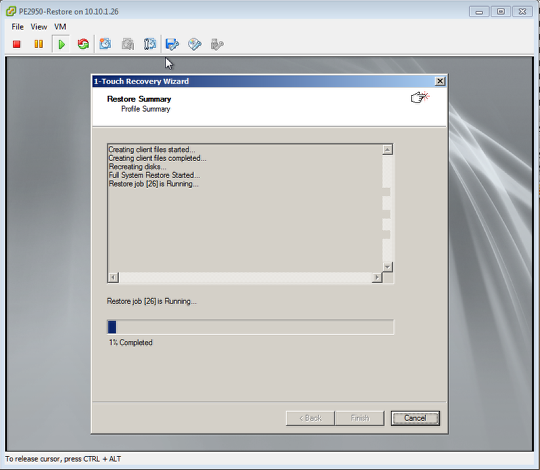
You can also observe the restore progress again at the CommCell Console.
In general this is a good point to go get a cup of coffee, or lunch, or...whatever. This is the point where the entire backup set for the machine is going to be restored, so if the machine has any size to it this could take a while.
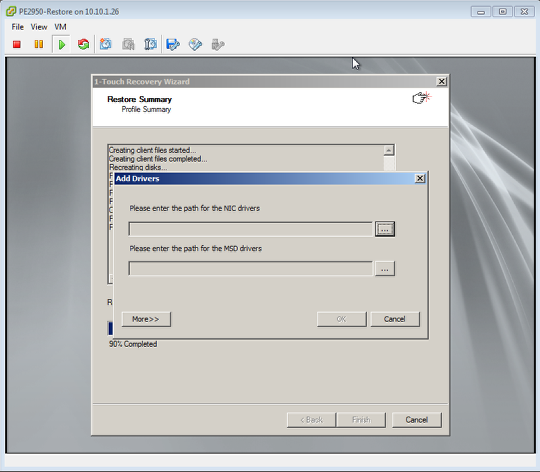
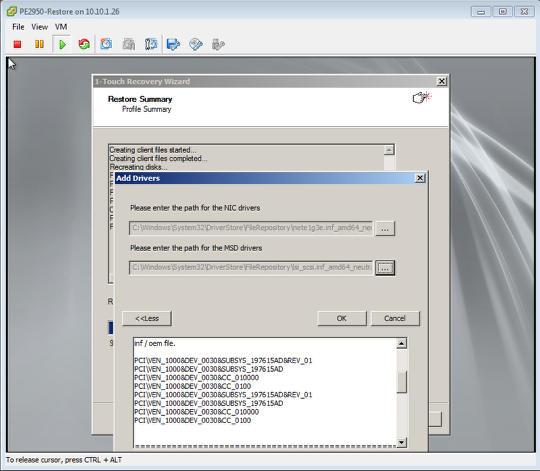
Time to map the drivers to the target system. CommVault does not automatically discover/remap these for you, so you need to tell the 1-Touch CD which drivers for LAN and Mass Storage Device (MSD) need to be used.
We know we need a Intel Pro1000 LAN, and a LSI Parallel SCSI (non-SAS) driver. Click on the browse buttons to the right, and look for the proper drivers under c:windowssystem32driverstorefilerepository
(note that clicking the "more" button will give a lot more detail to aid in finding the correct driver)
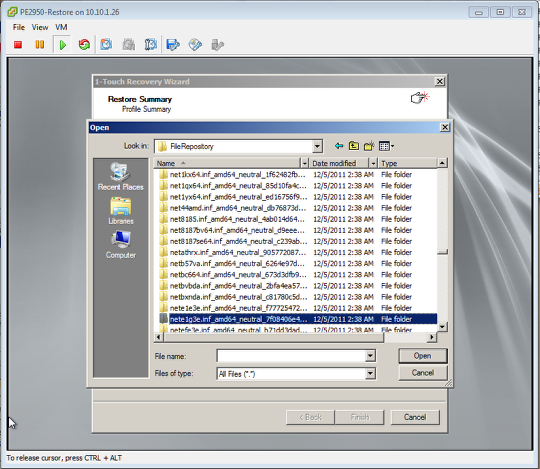
For reference, this is the directory containing the proper driver for the Pro1000 adapter we specified for the VM.
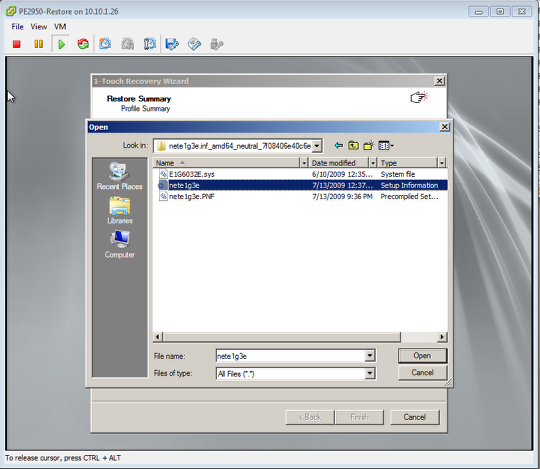
Select the .inf file (extension is suppressed). then click open.
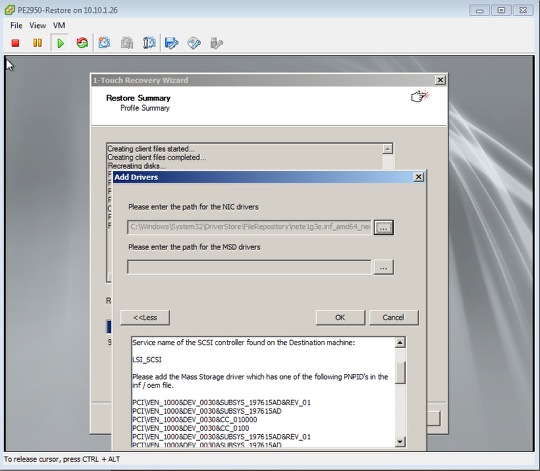
Now we need to do the same for the Mass Storage Device. Looking at the detail behind the 'more' button will help us confirm that we need the LSI_SCSI device, and the PNP device ID's that are expected. Make note of these ID's, we'll need them again in a minute. (might be worth copying them to the clipboard in the VM now).
Click the browse button and go find the LSI_SCSI driver.
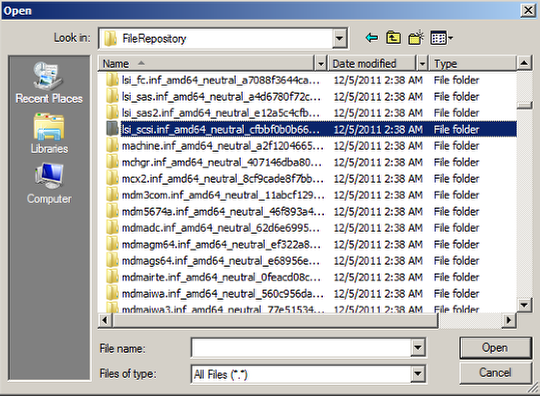
This is the directory containing the LSI_SCSI driver. Browse into the directory.
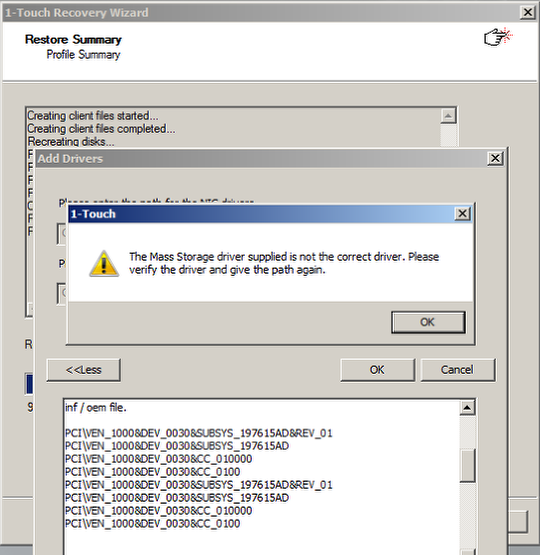
If you try to just use the driver as-is, you'll get the following error because the device IDs in the file don't quite match close enough for 1-Touch's satisfaction. To address this we need to edit the .inf file a little bit.
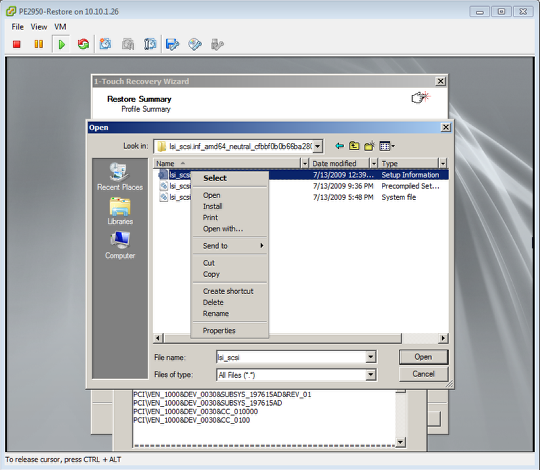
Right click the .inf file and select open with.
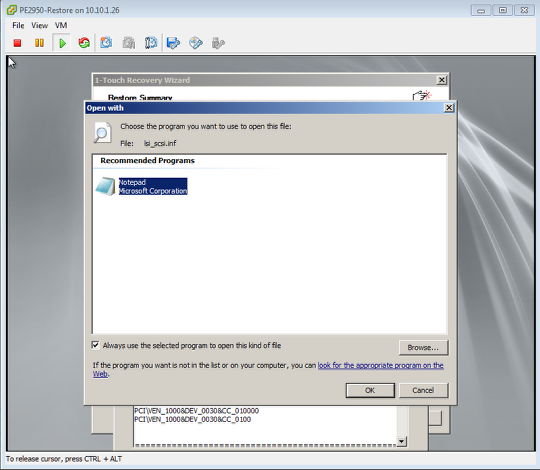
Accept the default of Notepad and click OK.
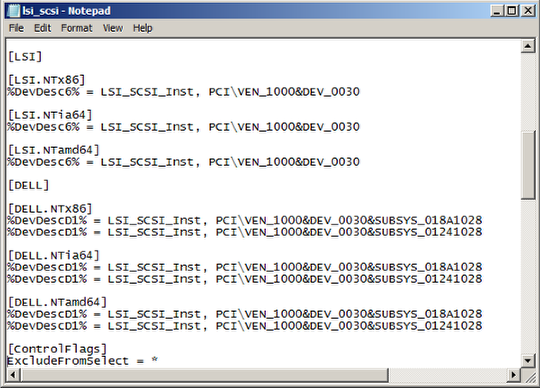
Scroll down to the section of the file which lists the device IDs. Unfortunately the IDs being requested by 1-Touch are longer than those in the file, so to make this happy we'll add the extend ID's that 1-Touch is looking for.
Below each section, paste in the ID's you copied from the details window, and edit to match the line above.
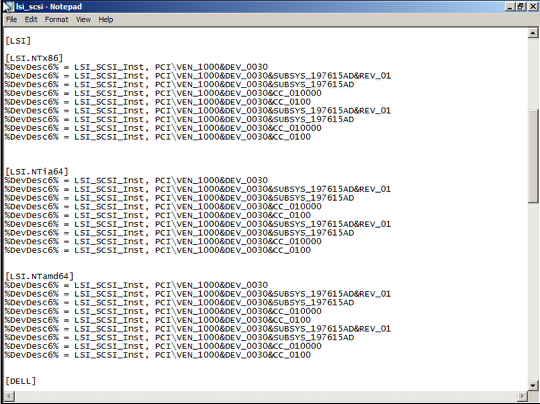
The modified file is shown. Save the file, then select and ok.
As an aside, this is the reason we picked the LSI_SCSI for our restore rather than the LSI_SAS controller. The SAS driver has the same issue, but there are many (many) more IDs to be updated when using that driver. It's easier to edit the simpler file, and then go back later and add a SAS based secondary disk to the VM, let windows auto-install the SAS driver. Once that's done you can then change the adapter to SAS for the primary disk if you really want to be using the virtual SAS controller.
If the file was modified correctly, you can now click ok to continue.
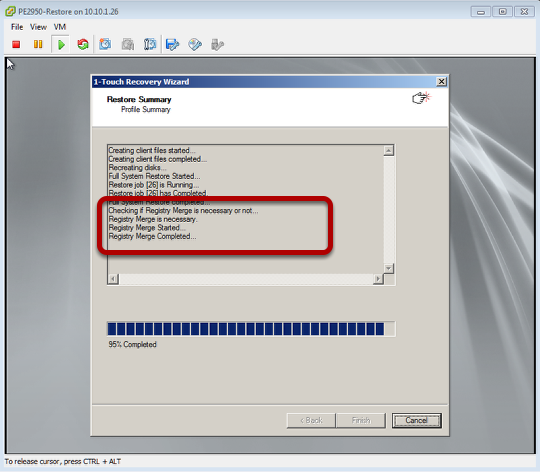
The registry merge section here has to do with updating the drivers on the system. These changes are what we needed to map the drivers for.
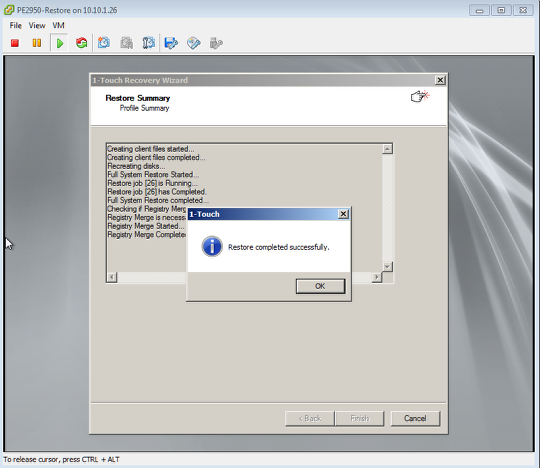
Click Ok to the "restore completed successfully" dialog. The system will then reboot. This would be a really good time to eject the 1-Touch CD.
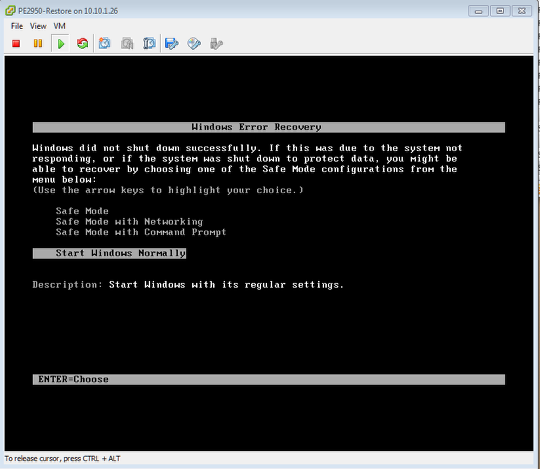
On reboot you may see this message. Don't panic. Remember that at the time the backup you're restoring was made, the server was powered on and running. This is ok, just start windows normally.
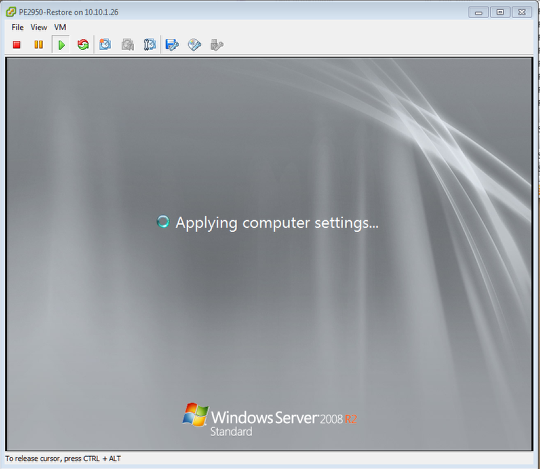
Be patient and let the machine boot up. This might take a bit, particularly if the original system had a lot of hardware management agents which will probably be none to happy in their new home. When the machine is ready go ahead and login. It might be best to use a local credential (rather than Domain).
Also don't be surprised if you login and are immediately logged off - drivers are being discovered and installed at this point and the machine may want to reboot a time or two.
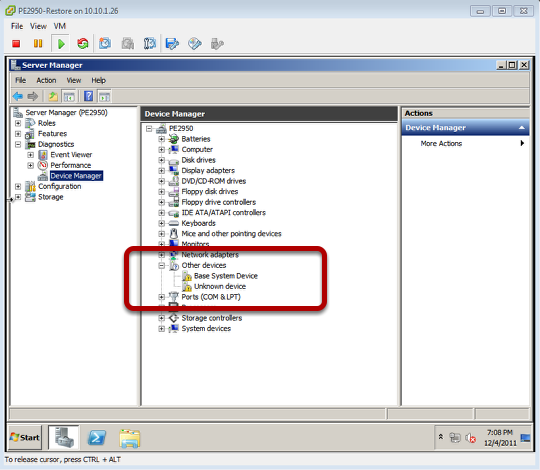
Before trying to fix the broken devices, this is a really good time to install VMware tools. After that you should be able to remove any broken devices from the restored system.
So, Install tools then clean-up any dead devices. Then uninstall any old hardware management stuff that doesn't belong in a VM (some may need to be disabled if it won't uninstall). This cleanup will vary from system to system.
That said, once the cleanup is done, you have recovered your physical system into a VM by way of the 1-Touch feature.