Citrix and Microsoft appear to be re-kindling their partnership and Azure could soon be the Citrix preferred cloud hosting solution. Check out this video at the 13:00 minute mark.
So should you move to Azure Resource Manager (ARM)? Here’s my experience so far and steps to support single image management in the portal.
ARM vs. Classic
These two portals are very different and should be treated as such. The ARM portal is nice and growing rapidly. It has a lot of potential, some great features, and is very snappy, but it is still lacking what many would consider basic functionality. But Microsoft is directing all new development to the ARM portal now versus the Classic portal. With this focus, I am sure it will mature in no time and fill in any missing pieces.
ARM and Citrix PVS/MCS
If you were thinking about spinning up XenApp/XenDesktop in ARM with Citrix MCS or PVS, MCS is the only option supported.
Note: this is a newly supported feature, previously unavailable, until the recent release of XenDesktop/XenApp version 7.11.
I have installed and started testing it and will be posting another blog in more detail soon, however...
I have already found that single image management with a small number of servers works much faster with PowerShell scripts. Here is some helpful information:
Server Roles and Sizing
- I used Server 2012 R2 for all of my servers.
- The Delivery Controller Size is D11v2(2vCPU, 14GBRAM). I installed Studio, Director, Licensing and StoreFront on this one server.
- My Netscaler uses size A2 (2vCPU, 3.5GB RAM) – There is an Azure template and I believe it is a modified version of 10.5 specifically to support the ONE IP configuration recommended for Azure deployments only. I upgraded this to 11.0 because I wanted the new look and features. I had to upgrade via command line, as the GUI option would not work. So far, there have been no issues…other than trying to figure out the one IP configuration.
- The SQL server2014 is size DS2 (2vCPU, 7GB RAM). The S indicates I can use premium storage. I have the Data drive on premium storage and the OS and logs drives on standard storage. Microsoft has a recommended setup for SQL performance best practices on Azure.
- My Session Host is size DS3v2 (4vCPU, 14GB RAM). The single OS drive is on premium storage. This added a little snag in the imaging process that I will mention later, but the performance is pretty sweet!
KEY TIPS:
- Plan ahead before creating your production VMs. If you want to use Azure availability sets or load balancing, you have to assign that to the servers at creation. You CANNOT add that later to an existing VM.
- You need to create resource groups and storage account(s) beforehand.
- Prepare your local PowerShell install by downloading the latest Azure Commands and importing the publishing file. Here is a good PowerShell Install and Configure Guide, but it is missing getting and importing the publishing file.
- You may have to modify the linked script if not everything is in the same resource group.
XenApp Software Install and Set up
I actually installed XenApp 7.8 and then upgraded to 7.9. The install and setup was pretty easy and straightforward. I like to reference Carl Stalhood’s blog for XenApp/XenDesktop 7.9 install procedures as he always has a lot of great notes and updates on known issues or workarounds that you may miss otherwise.
Remember, there will be no Host Connection in Studio since you are using ARM.
If you are in the same situation of an upgrade and want to snap the servers in case there are issues, also be aware that snapshots don’t exist. You have to back up and possibly restore. This is not very straightforward, but here’s how to do a Azure Resource Manager VM level backup and restore without snapshots.
When you install the VDA on the session host, make sure to select the option to “Create a Master Image.” I also decided to add the delivery controller manually.
Gold Image Management
Now for the fun (and ugly) business of single image management in Azure. Since there is no MCS yet, we are limited to using PowerShell and a couple other utilities.
Be prepared for lots of PowerShell if you decide to do anything advanced in ARM.
It took a lot of time and trial and error to get this working. I pulled different parts of my PS script from many different sources. (Thank you to all the people on the internet that helped me with this!). Here's my script you can download, we'll use it in step 4.a below.
Here are the Image Capture Steps:
1. 3rd party App Generalization
Once you have your server installs complete and are ready to capture as a template, first generalize any other apps that may require it. For instance, I have AppSense, SCOM, and SCEP that each have their own generalization process.
2. Generalize Windows
Here are some Azure blog resources that may help:
How to create a custom template image for Azure RemoteApp
How to create a VM image from an existing Azure VM
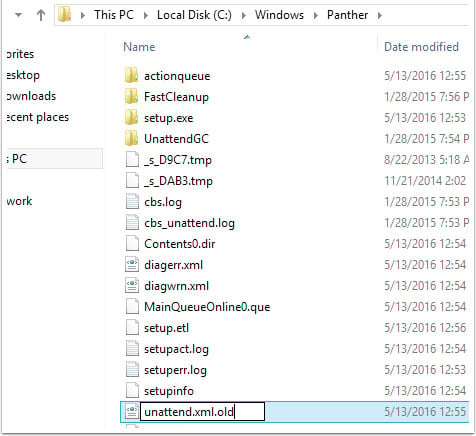
- Rename the unattend.xml file.
- Open CMD as the admin and run:
C:\Windows\System32\sysprep\sysprep.exe /generalize /oobe /shutdown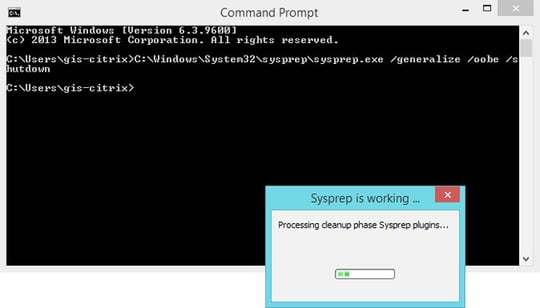

3. Capture the Image as a template.
This will place a vhd file in the templates folder. This folder is hidden by default in the ARM portal.
- Using the Azure Resource Explorer, Go to https://resources.azure.com/ and sign into your account.
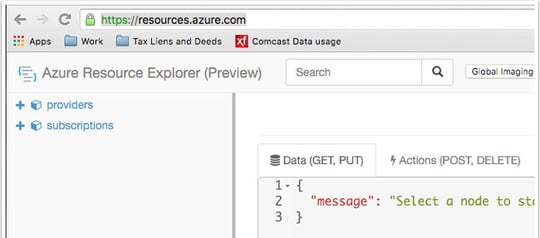
- At the top right, select Read/Write.

- Search for and select the server, which should be under Subscriptions > “Name” > ResourceGroups > “RSGName” > Providers > Microsoft.Computer > VirtualMachines.
- Click the Actions tab.

- Click Deallocate and wait for the device to show as deallocated in the Azure portal.
- Click Generalize. You can verify the status changes by clicking the InstanceView menu under your virtual machine name on the left side, and navigating to the Statuses section on the right side.
- Modify the capture settings and click Capture. The vhd Prefix has a limit of 23 characters, i.e.:
"vhdPrefix": "XenApp79_DateMilitaryTime",
"destinationContainerName": "templates",
"overwriteVhds": "false"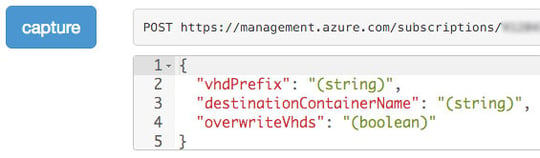


The VM will no longer be usable. From the portal you can delete the VM, disk and NIC for the server used to create the template.
4. Create a new VM with static IP from a custom template.
If you are updating an existing session host VM from an older template, delete the session host VM, disk and NIC first.
- Edit the PowerShell CreateVM.PS1 (download here) with the correct variables for the new VM. The Azure Resource Group, Storage Account, Network, Subnet, etc. should have been created beforehand. You can get the template location and name from the ARM portal or Azure Storage Explorer. However, neither would show me the template folder in the premium storage account. If you run into this issue, here’s how to view the templates folder in Azure Resource Manager Premium Storage.
- The script will ask you to log in with valid Azure credentials.
- Set the local account and password for the new VM.
- The script will create the VM and then close the window when complete.
The sysprep performed on the template will wipe out several settings. I would like to automate the post step, but for now, it is a manual process.
- RDP to the new server using the local account you created.
- Click Yes for the Networks.

- Change the TimeZone.

- Join your domain and restart.


…If the VM is new to the domain and XenApp:
- Move the machine account to the Citrix OU.
- Run GPupdate, force and reboot.
- In Citrix Studio, add the server to the Machine Catalog.
- In Citrix Studio, add the machine to the Delivery Group.
Let me know if you have any questions! Or  for a consultation and review of your current Citrix environment.