With XenServer 5.6 Citrix removed the old Linux P2V tool which was included in earlier versions of XenServer. The old version 5.5 tool will not work with XenServer 5.6, and only supported older distributions.
For this reason is may be desirable to manually convert a Linux physical machine to a XenServer VM. This document attempts to provide a general guide to completing this process.
Move system image to VM
There are several ways to do this. Any tool which can copy the blocks or the filesystem from one "bare metal" machine to another will work. You can use a live CD like Knoppix, or the "System Rescue CD" or commercial utilities like Ghost or even PortLock storage Manager. Most linux distributions also have a "recovery" mode from the install media which can also be used for this. If your machine is a VM from another platform you can convert the disk to a VHD or an OVF and simply import that.
In this example we're going to use a basic live CD, and the DD utility to move the block image intact to the new VM. As always there is more than one way to skin this particular cat.
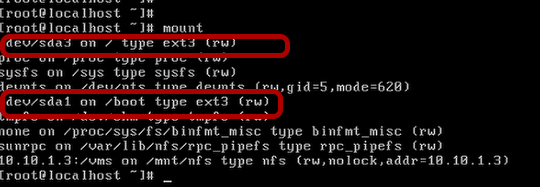
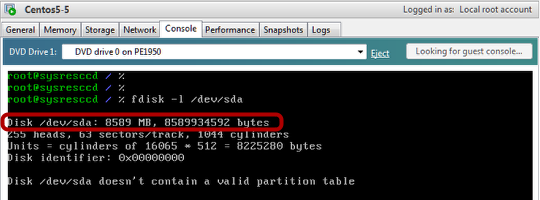
Once you've booted your live CD, Verify where your fileystems are at. In this particular case our root filesystem is at /dev/sda3 and the /boot filesystem is at /dev/sda1
Make sure that these are the real fileystems of the machine you're wanting to convert. The example above might not match your environment!
Knowing where these are at is critical. Depending on the live CD and your particular partitoining/LVM layout your configuration may be different.
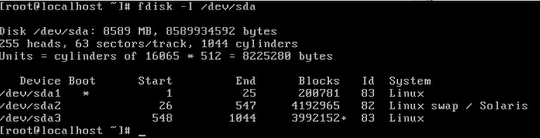
We want to capture our current partition information, and the size of the source disk. Our target disk will need to be as large or larger than the source.
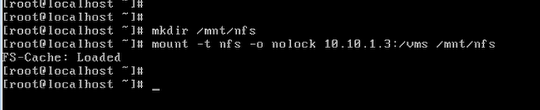
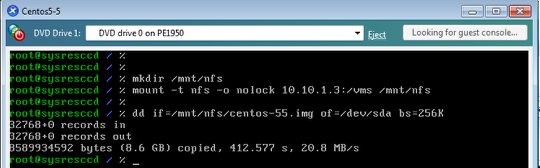
Get yourself some space to work with. Above we created a mount point /mnt/nfs and attached to some handy NFS storage, but you could also use a CIFS based fileshare, or with a little creativity the need for the disk space can be mitigated through use of an SSH tunnel.

Use dd to copy the harddisk to an image on the NFS server. Note that dd does not produce any output until the job is complete. Sending a hup signal to the process will give you some progress information however.
If possible, it's always cleanest to dismount or make sure the fileystems are not mounted before you start the dd process. Failure to do so can result in corrupted filesystems on the target.

When the dd is complete, we can shutdown the source system.
Create target virtual machine and restore the image
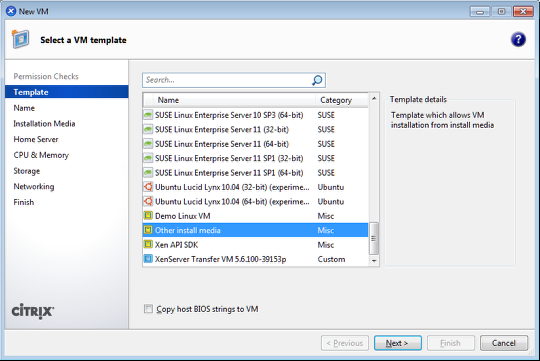
Use the other install media to create a HVM mode virtual machine which we'll transfer your image into. Complete the wizard configuring RAM, CPU, and Networking to your needs. Make sure you configure the storage to match the size of the original machine's disk.
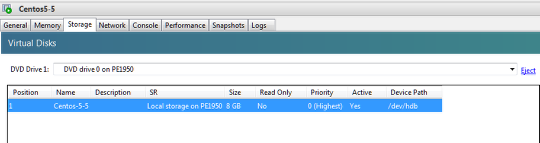
Make sure your storage is correct. Mount your live CD on to the VM.
Boot the VM from the live CD and confirm that you see the VM's hard disk and that it's the correct size.

mount the file share, and reverse the dd command to write the image onto the virtual machine's hard disk.
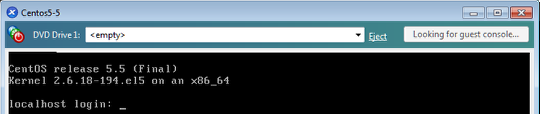
When dd completes, reboot the VM and eject the CD.
Ok, so far so good, the VM booted the transplanted OS. Now we just need to convert the HVM to a PVM and enable the XenServer tools.
Converting the HVM into a PVM mode virtual machine.
HVM based virtual machines work by emulating physical hardware and allow unmodified guests to run on top of XenServer. Such machines allow operating systems like Windows which cannot be modified to boot and run on XenServer.
PVM based virtual machine work by way of sharing physical devices in an intelligent manner made possible by the virtual machine's awareness that it is a VM. This requires modification of the system's kernel and device drivers. PVM mode guests are almost exclusively Linux based.
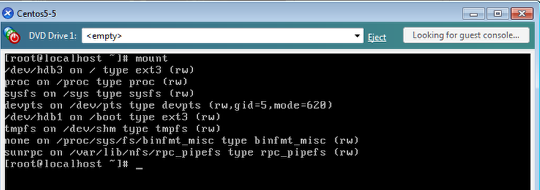
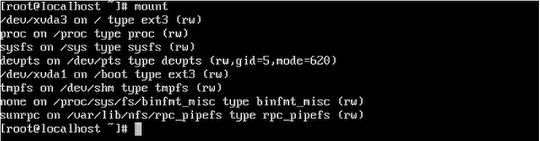
Start by checking the virtual machine's filesystems - note that we are currently booting from /dev/hda# indicating emulated hardware.
Knowing that we're on emulated hardware, and now knowing where our volumes live we can start modifying the operating system to run on paravirtualized hardware.

modify /etc/modprobe.conf (or your distribution's equivalent) to include the xen modules for storage and networking. You can also probably remove the old hardware modules if present.
vi /etc/modprobe.conf
alias scsi_hostadapter xenblk
alias eth0 xennet
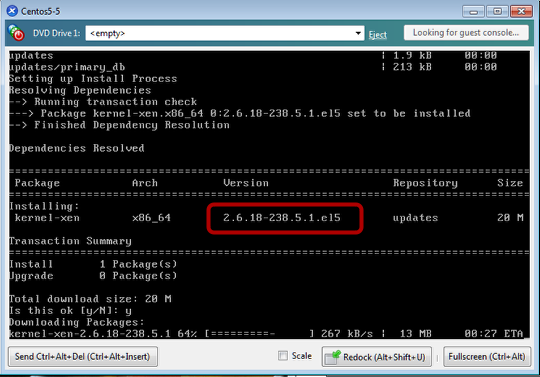
Install the Xen-aware kernel for your distribution. This will be something similar to "yum install kernel-xen"
Make not of the kernel version which is installed.
Update the bootloader configuration so that the new kernel is the default, and that the bootloader is configured properly for Xen. Note the before and after screenshots below.
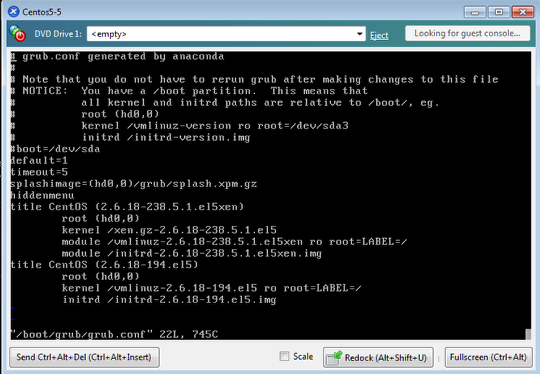
Before
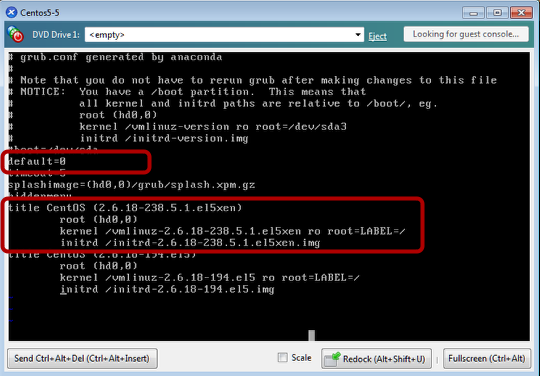
After - the changes are highlighted above.

Rebuild the initrd including directives to preload the xen driver modules. Note that you MUST build this appropriately to the kernel version you just installed.
One the initrd has been rebuilt, shut down the os cleanly.
Activity now moves to the console of the Xen Host. You can do this within the console provided by XenCenter, or from a ssh session.
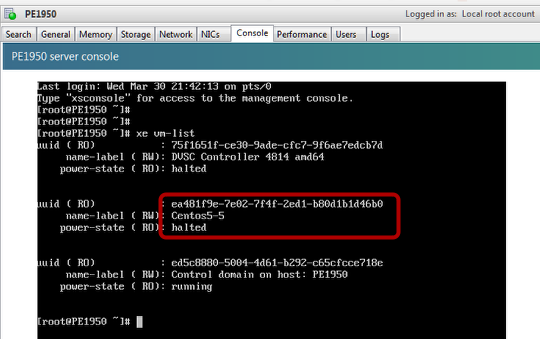
Use the xe vm-list command to determine the uuid of the virtual machine you're working on. We want to modify this VM to be a PVM mode guest rather than a HVM mode one.
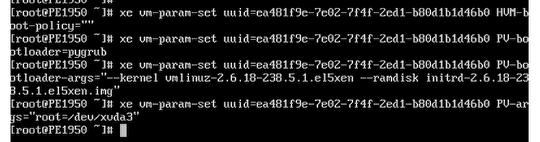
Update VM Parameters to enable PVM mode
xe vm-param-set uuid=<vm uuid> HVM-boot-policy=""
xe vm-param-set uuid=<vm uuid> PV-bootloader=pygrub
xe vm-param-set uuid=<vm uuid> PV-bootloader-args="--kernel <path to kernel> --ramdisk <path to xen initrd>"
xe vm=param-set uuid=<vm uuid> PV-args="root=/dev/xvda#"

Obtain the UUID of the virtual machine's boot disk using the xe vm-disk-list command. The UUID supplied is the UUID of the virtual machine.
You now want the VBD UUID for the boot disk.

Mark the VBD as bootable using the xe vbd-param-set uuid= command as shown above.
Restart XenCenter
For unknown reasons it is necessary that XenCenter be restarted at this point. Exit and restart XenCenter.
Failure to do so will prevent you from seeing the console of the VM when it's powered on.
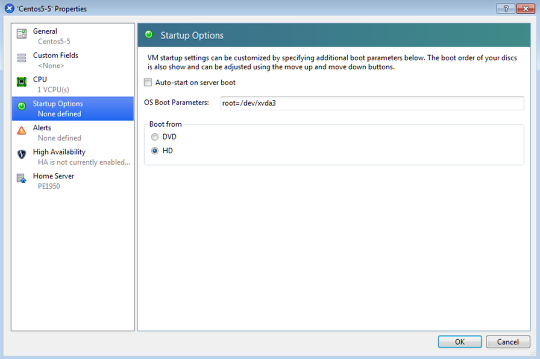
Check the properties of the VM, and make sure that the HD is set as the only boot device for the VM. Then power on the virtual machine.
This is the point where we will find what mistakes have been made - if the system panics, double check your boot device/paths/etc.
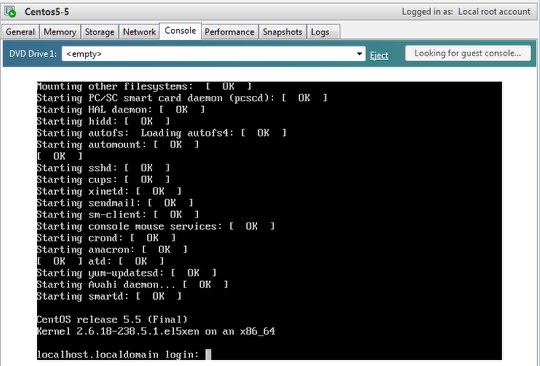
The system is up on the Xen Kernel
The fileystems are up on the paravirtual devices as well.
However XenCenter does not yet report that we are running fully paravirtualized, and features such as live migration will not yet be available.
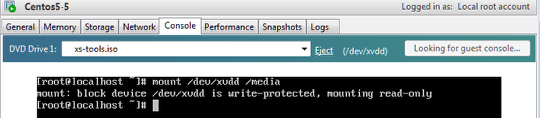
Mount the xs-tools.iso to the virtual machine, and then mount the cdrom within the vm.
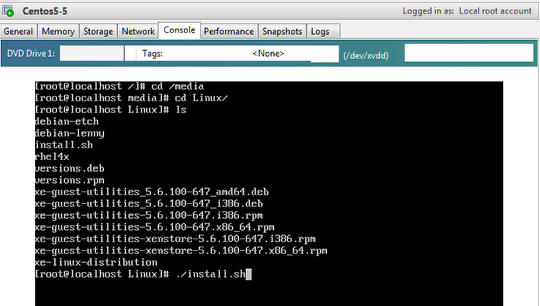
Install the XenServer tools
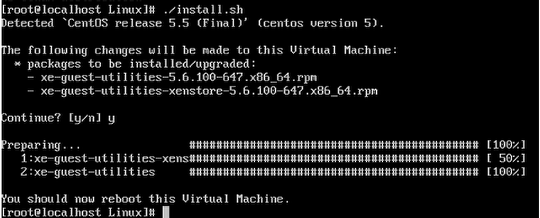
The tools are now installed.
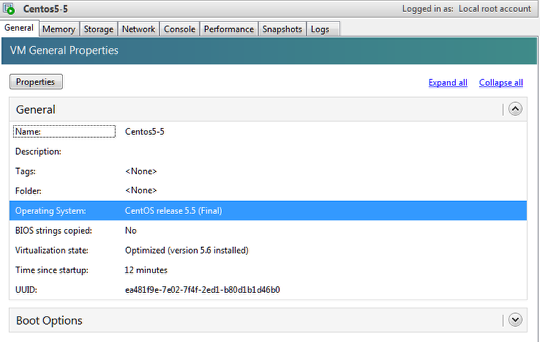
Now XenCenter will report the system as being optimized, and live migration is available.
Reboot the virtual machine and eject the CDROM.
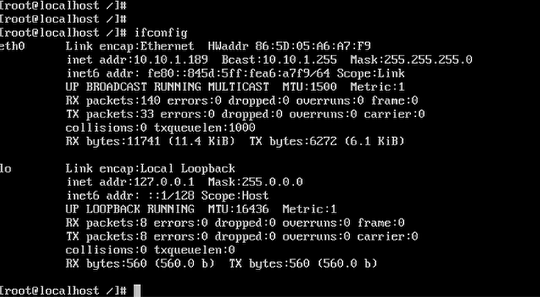
Networking
One last issue may exist depending upon the configuration of the network adapter. Shown above eth0 is down.
You will need to 'fix' the networking config for your distribution. For RHEL/CentOS the relevant configuration lives under /etc/sysconfig/network-scripts in a file named ifcfg-eth0
This file must exist, it may have been renamed (.bak) if so copy it back then modify the copy.

Remove or comment the HWADDR line and save the file.

Restart the network to bring the interface online.
This completes the conversion. Your linux system is now a XenServer paravirtualized virtual machine.
Summary cheat sheet
Remove any attached CDs
Boot the imported VM
vi /etc/modprobe.conf adding
alias scsi_hostadapter xenblk
alias eth0 xennet
yum install kernel-xen
Update /boot/grub/grub.conf
Make the Xen Kernel the default for boot
Make note of the kernel and initrd file names
Modify grub.conf to be similar to the below
title CentOS (2.6.18-128.2.1.el5xen)
root (hd0,0)
kernel /boot/vmlinuz-2.6.18-128.2.1.el5xen ro root=LABEL=/
initrd /boot/initrd-2.6.18-128.2.1.el5xen.img
Make new Xen initrd
mkinitrd -v -f --preload=xennet --preload=xenblk /boot/initrd-2.6.18-128.el5xen.img 2.6.18-128.el5xen
shutdown the VM
Find uuid of the VM (b6ebbe09-2bcb-5c40-0f98-f33426487142)
xe vm-list
Update VM Parameters
xe vm-param-set uuid=<vm uuid> HVM-boot-policy=""
xe vm-param-set uuid=<vm uuid> PV-bootloader=pygrub
xe vm-param-set uuid=<vm uuid> PV-bootloader-args="--kernel <path to kernel> --ramdisk <path to xen initrd>"
xe vm=param-set uuid=<vm uuid> PV-args="root=/dev/xvda#"
Find UUID of boot disk
xe vm-disk-list uuid <vm uuid>
... looking for the vBD UUID of disk0
Set the disk VBD to bootable
xe vbd-param-set uuid=<vbd uuid> bootable=true
exit and restart XenCenter console (odd bug)
Check the boot settings for the VM, make sure only hard-disk (HD) is selected.
Start the VM
install XenServer tools & reboot.