When using Virtual Machines (VM's) from other VMware products, the easiest way to get these VM's into ESX/vSphere is to use VMware's product called vCenter Converter Standalone. vCenter Server does include a version of Converter, however I've had better success in using the standalone version to do VM conversions as it is (typically) a newer version with more features than the one included with vCenter. This lesson describes how to use vCenter Converter Standalone to import VM's or VMDK files from other VMware Products, such as VMware Fusion, VMware Workstation and VMware Server.
Powering On VM - Error with VMDK Files

We experienced the shown error when trying to power on a few virtual machines from a vendor of ours. I assumed that the VM's were in ESX/vSphere format, but I guess they are not. It looks like we'll need to convert the VMDK's to the ESX/vSphere format so that we can use them.
Error Message: Failed to find a host for powering on the Virtual Machine.
The following faults explain why the registered host is not compatible.
Device 'Hard Disk 1' uses a controller that is not supported. This is a general limitation of the virtual machine's virtual hardware version on the selected host.
Device 'Hard Disk 2" has a backing type that is not supported. This is a general limitation of the virtual machine's virtual hardware version on the selected host.
Verifying the VMDK is not in an ESX/vSphere Format

We SSH'ed into the vSphere server and browsed to the VMFS datastore that holds our Virtual Machine. As shown in the screenshot, we can tell the VMDK is not an ESX/vSphere compatible VMDK for the following reasons:
- There is no "-flat.vmdk" file, which all ESX/vSphere type of VMDK's should have.
- There are VMDK "slices" as shown in the screenshot. ESX/vSphere VMDK's do not use this type of disk format (where other VMware products such as Workstation and Server do).
You can use VMware Converter to fix this issue by converting the VM to an ESX/vSphere compatible VM.
IDE VMDK - Not Supported in ESX/vSphere

An error that you might receive when using a VM from another product is: An IDE controller is found but the virtual machine does not support the option.
The reason that this fails is that ESX/vSphere does not support IDE based Virtual Disks (VMDK's) like the Desktop/Hosted products do. You can use VMware Converter to fix this error by converting the VM to an ESX/vSphere compatible VM.
Flat Backing Option Not Found
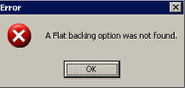
An error that you might receive when using a VM from another product is: A flat backing option was not found.
The reason for this error is that ESX/vSphere is looking for a virtual disk file (VMDK) that actually points to a -flat.vmdk file. The Desktop/Hosted products do not use this type of Virtual Disk but ESX/vSphere does. You can use VMware Converter to fix this error by converting the VM to an ESX/vSphere compatible VM.
Sparse Backing Info Disk Option Not Found

Another error that you might receive when using a VM from another product is: A SparseVer2BackingInfo disk is found but the virtual machine does not support the option.
This error is shown because this virtual disk uses a "sparse" feature on the virtual disk, so as not to take up a lot of space on the drive. Usually the VMDK file will also be "split" into multiple VMDK files that end in a -0001, -0002 and so on. This is done to limit the size of the VMDK. ESX/vSphere does very similar options with VMDK files however it is done differently. This is the reason for the error shown. You can use VMware Converter to fix this error by converting the VM to an ESX/vSphere compatible VM.
Download VMware vCenter Converter Standalone Edition
Once you've downloaded the program, install it on a server that you can use for the migrations. I usually install it on my vCenter server but that's not a requirement. Once installed, go ahead and start vCenter Converter Standalone.
Convert Machine

Once the program starts, choose "Convert Machine" to get started.
Selecting Source for Conversion

First, select the source type, which in our case will be a "VMware Workstation or other VMware virtual machine" (1). Then browse to where the virtual machine is located at (2). This will need to be on a network share or on a local drive so that Converter can access the files. Then choose the Next button to proceed (3).
Selecting Destination for Conversion

Select the destination type, which in our case will be a "VMware Infrastructure Virtual Machine" (1). Then specify either an ESX/vSphere server or a vCenter Server along with the required login information for that host (2). Then select "Next" to proceed (3).

Now, specify the Virtual Machine name (1), the destination Datastore (2) and then click "Next" to proceed (3).
Note: If you use "Version 7" for the Virtual Machine hardware version, you will not be able to use this VM on anything but vSphere 4. If you need to use this VM on ESX 3.x then choose "Version 4" for the Virtual Machine hardware version.
VM Options

This screen will show various options that you can specify for the newly created Virtual Machine. Your options may differ or you may want to change a few things here depending on your environment. A couple of options that I normally select is under "Advanced Options" (1). Select the option to "Power on target Machine" (2) and to also "Install VMware Tools on the imported Virtual Machine" (3). This will automatically startup and install VMware tools on the new virtual machine after the cloning process is finished. Next, click on the "Next" button (4) to proceed.
Wizard Summary

A summary screen is displayed. If you need to edit any of the options on this screen, you'll need to back up through the wizard to that specific area. If you are ready to proceed, click on the "Finish" button to begin the conversion process.
Running Conversion

You can check the status of the conversion by following the "Status" area for the conversion job. You can also use the "Task Progress" tab to see more detailed information about the conversion.
Conversion Completed

Once the conversion is completed, you'll see the status of the job change to "Completed".

Now, you can use the vSphere Client to log into your vSphere (or ESX) environment and you will see your newly created Virtual Machine, which has already been powered up successfully.
Read More Posts about VMware vSphere
Looking for a virtualization solution provider or advanced vSphere support? 
Lewan Technology is a VMware Premier Solutions Partner headquartered in Denver, Colorado, with certified technical professionals in server and desktop virtualization, business continuity, hybrid cloud, management operations and software-defined storage.